How MarQi Cloud’s SAN Storage Outperforms Traditional Block Storage
June 22, 2026
How MarQi Cloud Backups and Snapshots Protect Your Business Data
June 23, 2026
The Complete MarQi Cloud VPS Setup Guide for Developers (2026 Edition)
Introduction
In today’s fast-paced digital landscape, developers require robust infrastructure to support their applications and projects. Virtual Private Servers (VPS) offer a perfect balance between performance and cost-effectiveness, allowing developers to manage their environments with flexibility and control. This guide aims to provide a comprehensive overview of setting up a VPS on MarQi Cloud, ensuring you harness the full potential of our enterprise-grade cloud infrastructure.
What is a VPS?
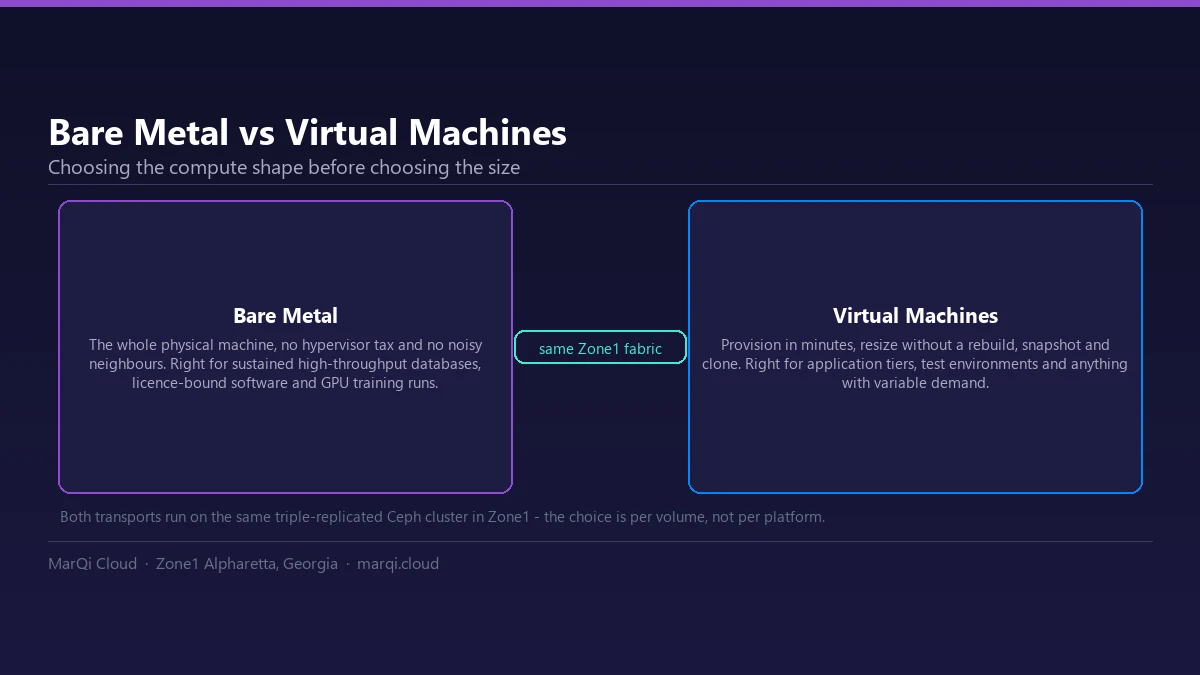
A Virtual Private Server (VPS) is a virtualized server that mimics a dedicated server’s functionality within a shared hosting environment. By partitioning a physical server into multiple virtual servers, a VPS offers dedicated resources such as CPU, RAM, and storage, without the higher costs associated with dedicated hosting.
Why Choose MarQi Cloud for Your VPS Needs?
MarQi Cloud stands out in the crowded cloud service market due to its unique value propositions:
Enterprise-Grade Cloud Infrastructure
Our infrastructure is built to handle enterprise-level workloads, ensuring reliability and performance.
Hybrid Cloud Deployment Models
MarQi Cloud supports various deployment models, allowing you to choose what best fits your business needs.
Private and Secure Hosting Environments
Security is paramount. Our hosting environments are designed to protect your data and applications.
Scalable Compute and Storage Resources
As your business grows, easily scale your resources to meet demand without downtime.
Business Continuity and Disaster Recovery Solutions
Our solutions ensure your data is safe and recoverable in any situation.
Performance-Driven Infrastructure Design
Experience superior performance with our high-speed infrastructure optimized for speed and efficiency.
US-Based Infrastructure and Support
Enjoy peace of mind with our US-based infrastructure, coupled with 24/7 support from our expert team.
Flexible Pricing Models
Choose from various pricing options that align with your budget and needs.
Getting Started with MarQi Cloud VPS
Step 1: Sign Up for an Account
The first step to setting up your VPS is to create an account with MarQi Cloud. Visit our website and click on the ‘Sign Up’ button. Provide the required information, including your email address, payment details, and any necessary verification. Once your account is created, you will receive a confirmation email.
Step 2: Choose Your VPS Plan
MarQi Cloud offers various VPS plans tailored to different needs. Consider the following when selecting a plan:
- Resource Requirements: Assess your CPU, RAM, and storage needs based on your application requirements.
- Traffic Expectations: Estimate your expected traffic to determine the necessary bandwidth.
- Budget: Choose a plan that fits your budget while providing the resources you need.
Step 3: Configure Your VPS
After choosing your plan, it’s time to configure your VPS. Here are the essential configurations to consider:
- Operating System: Select the OS that best suits your development needs, such as Linux (for example, Ubuntu LTS) or Windows.
- Server Location: Choose a data center location that is closest to your target audience for optimal performance.
- Additional Features: Consider enabling features like backups, monitoring, and additional security measures.
Step 4: Provision Your VPS
Once you’ve configured your VPS, proceed to provision it. This process may take a few moments as MarQi Cloud sets up your server environment. You will receive an email notification once your VPS is live, including access details.
Step 5: Accessing Your VPS
To access your new VPS, you’ll need to use SSH (for Linux) or Remote Desktop (for Windows). Follow these steps:
- For Linux: Open your terminal and use the command
ssh username@your-vps-ip. Replaceusernamewith your server’s username andyour-vps-ipwith the IP address provided in your email. - For Windows: Use Remote Desktop Connection (RDP) by searching for it in your Start menu and entering your VPS IP address.
Step 6: Initial Server Setup
After accessing your VPS, perform initial setup tasks:
- Update Your System: Run updates to ensure your system is secure and up to date. For Linux, use
sudo apt update && sudo apt upgrade. - Install Necessary Software: Depending on your project, install web servers (Apache, Nginx), databases (MySQL, PostgreSQL), or any other software required.
- Configure Firewalls: Set up firewall rules to protect your server from unauthorized access.
Step 7: Deploy Your Application
With your VPS configured and secured, it’s time to deploy your application. Upload your files using SFTP or Git, configure your web server, and ensure all dependencies are met. Test your application thoroughly to confirm it runs smoothly in the new environment.
Step 8: Monitor and Maintain Your VPS
Once your application is live, continuous monitoring and maintenance are crucial:
- Performance Monitoring: Use monitoring tools to track resource usage and performance metrics.
- Regular Backups: Schedule regular backups to avoid data loss.
- Security Updates: Keep your software and server environment updated to protect against vulnerabilities.
Best Practices for VPS Management
To maximize your VPS’s efficiency and performance, consider these best practices:
- Use Strong Passwords: Ensure all accounts have unique, strong passwords to prevent unauthorized access.
- Limit User Access: Provide access only to those who need it, implementing the principle of least privilege.
- Implement SSL Certificates: Secure your website and applications with SSL certificates to protect user data.
Conclusion
Setting up a VPS on MarQi Cloud is a straightforward process that empowers developers to create, deploy, and manage applications effectively. With our enterprise-grade infrastructure, flexible pricing models, and dedicated support, MarQi Cloud is your ideal partner for cloud solutions. Follow this guide to ensure you make the most out of your VPS setup and enjoy a seamless development experience.
FAQs
1. What is the difference between VPS and shared hosting?
VPS provides dedicated resources and greater control compared to shared hosting, where resources are shared among multiple users.
2. Can I upgrade my VPS plan later?
Yes, MarQi Cloud allows you to upgrade your VPS plan as your resource needs grow.
3. What operating systems are supported on MarQi Cloud VPS?
MarQi Cloud supports various operating systems, including popular Linux distributions and Windows.
4. How does MarQi Cloud ensure data security?
We employ advanced security measures, including firewalls, DDoS protection, and secure data centers to protect your data.
5. Can I access my VPS from anywhere?
Yes, as long as you have internet access, you can connect to your VPS from any location.
6. What kind of support does MarQi Cloud offer?
Our support team is available 24/7 to assist with any technical issues or inquiries.
7. How do I back up my VPS data?
MarQi Cloud provides backup solutions that you can configure to automatically back up your data at regular intervals.
8. Is there a money-back guarantee for new users?
Yes, we offer a money-back guarantee within a specified period for new users to try our services risk-free.
9. Can I host multiple websites on one VPS?
Yes, you can host multiple websites on one VPS by configuring virtual hosts in your web server.
10. What happens if my VPS goes down?
Our infrastructure is designed for high availability, and we provide disaster recovery solutions to minimize downtime.